
singer brilliance 6180 manual
Singer Brilliance 6180 Manual: Article Plan
This comprehensive guide details the Singer Brilliance 6180 sewing machine. Resources like Manualsdir.ru and Mcgrp.ru offer 44-page manuals and visual aids. Explore online instructions and diagrams for optimal use.
The Singer Brilliance 6180 is a popular computerized sewing machine‚ renowned for its versatility and user-friendly design. It caters to both beginners venturing into the world of sewing and experienced enthusiasts tackling more complex projects. This machine boasts a range of built-in stitches‚ offering creative possibilities for garment construction‚ quilting‚ and home décor.
As indicated by resources like Manualsdir.ru and Mcgrp.ru‚ the Brilliance 6180 comes with a detailed instruction manual – often spanning 44 pages – crucial for understanding its full capabilities. These manuals‚ available online‚ provide step-by-step guidance on everything from initial setup to advanced techniques. The machine’s digital display and intuitive controls simplify stitch selection and adjustment‚ making it accessible to sewers of all skill levels.
The Singer Brilliance 6180 isn’t just about convenience; it’s about precision and durability. Its robust construction ensures reliable performance‚ while features like adjustable stitch length and width allow for customized sewing. Whether you’re a hobbyist or a serious seamstress‚ the Brilliance 6180 aims to deliver consistent‚ high-quality results. Online resources provide visual aids‚ like images from Mcgrp.ru‚ to further enhance the learning experience.
Key Features and Specifications
The Singer Brilliance 6180 distinguishes itself through a robust set of features. It offers 80 built-in stitches‚ encompassing decorative‚ stretch‚ and essential options for diverse projects. A fully automatic one-step buttonhole function simplifies button attachment‚ while the adjustable stitch length and width provide customization. The machine features an automatic needle threader‚ saving time and frustration.
Specifications include a maximum sewing speed‚ typically around 750 stitches per minute‚ and an adjustable presser foot pressure to accommodate various fabric types. The machine’s free arm design facilitates cuff and sleeve sewing. It’s compatible with Singer System 130/705H needles‚ and utilizes a standard Class 15 bobbins.
As detailed in manuals found on sites like Manualsdir.ru and illustrated on Mcgrp.ru‚ the Brilliance 6180 includes a drop-in bobbin system for easy loading and monitoring. The machine’s lightweight construction enhances portability. Furthermore‚ the digital display clearly shows stitch selection and settings. These features combine to create a versatile and efficient sewing experience‚ making it a popular choice for both beginners and experienced sewers.
Unboxing and Initial Setup
Upon unboxing your Singer Brilliance 6180‚ carefully inspect all components against the parts list in the included manual – resources like Manualsdir.ru provide downloadable versions. You should find the sewing machine itself‚ a power cord‚ a foot controller‚ various presser feet (standard‚ zipper‚ buttonhole)‚ bobbins‚ needles‚ a screwdriver‚ a seam ripper‚ and a brush.
Initial setup begins with placing the machine on a stable‚ flat surface. Connect the power cord and foot controller. Next‚ attach the power cord to the machine and plug it into a grounded outlet. Install the bobbin following the diagrams in the manual; ensure it’s correctly seated in the bobbin case. Thread the upper thread‚ utilizing the numbered threading path guide – visual aids on Mcgrp.ru are helpful here.
Finally‚ perform a test stitch on scrap fabric to confirm proper threading and tension. Familiarize yourself with the machine’s controls‚ including the stitch selection dial‚ stitch length and width adjustments‚ and the reverse lever. Refer to the manual for detailed illustrations and troubleshooting tips. A properly set up machine ensures a smooth and enjoyable sewing experience.
Understanding the Machine Components
The Singer Brilliance 6180 boasts several key components. The power switch controls operation‚ while the foot controller regulates sewing speed. The stitch selection dial allows you to choose from a variety of stitch patterns‚ detailed in your manual (available on sites like Manualsdir.ru). Adjust stitch length and width using dedicated dials for customized results.
The bobbin winder prepares bobbins for use‚ and the bobbin case holds the lower thread. The presser foot secures fabric during stitching; various feet are included for specialized tasks. The needle clamp secures the needle‚ and the thread tension dial controls thread tightness.
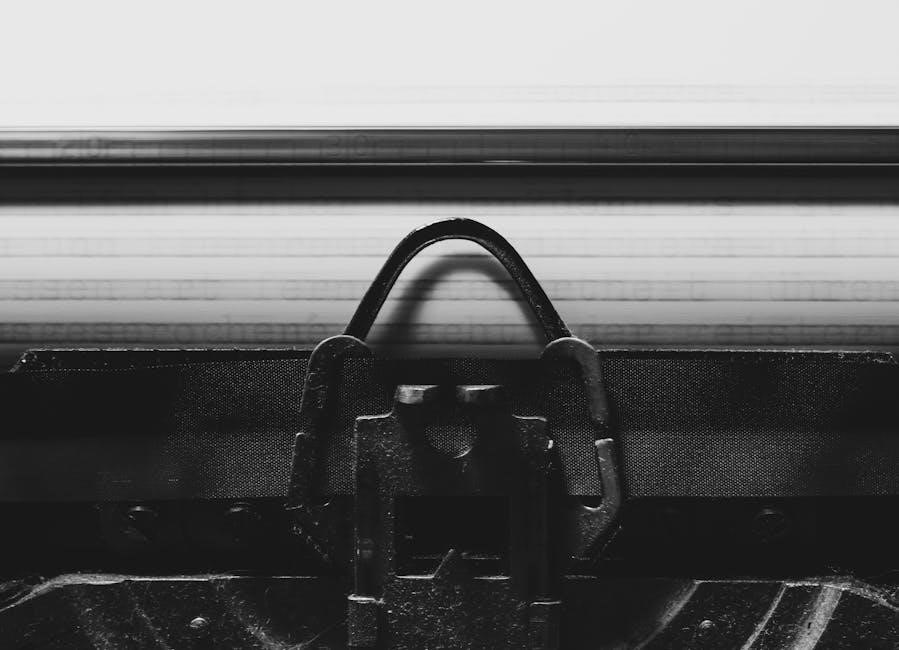
The take-up lever guides the upper thread‚ and the handwheel allows manual control. Mcgrp.ru provides images illustrating these parts. Understanding the function of each component‚ as outlined in the machine’s documentation‚ is crucial for efficient operation and maintenance. Familiarize yourself with their locations and how they interact to achieve desired stitching outcomes. Proper component knowledge prevents errors and extends the machine’s lifespan.
Threading the Singer Brilliance 6180
Threading the Singer Brilliance 6180 requires following a specific sequence. Begin by raising the presser foot. Guide the thread from the spool pin‚ through the first thread guide‚ and around the tension disc – ensuring it seats firmly between the discs for proper tension. Next‚ lead the thread up and through the take-up lever‚ then down and around the second thread guide.

Continue threading through the needle clamp and finally‚ thread the needle from front to back. Refer to diagrams available on resources like Manualsdir.ru and Mcgrp.ru for visual guidance. Incorrect threading can cause skipped stitches or tension issues.
Always double-check that the thread is correctly seated in each guide and the tension disc. A properly threaded machine is essential for consistent stitch quality. The manual provides detailed illustrations and troubleshooting tips for common threading problems. Practice this process until it becomes familiar‚ ensuring smooth and efficient sewing. Remember to re-thread if changing thread colors or experiencing difficulties.
Winding the Bobbin
Winding the bobbin on the Singer Brilliance 6180 is a straightforward process. First‚ place the spool of thread onto the spool pin. Next‚ draw the thread through the thread guide and onto the bobbin. Secure the bobbin onto the bobbin winder spindle‚ ensuring it clicks into place.
Push the bobbin winder to the right and engage the bobbin winding mechanism by pressing down on the bobbin winder stem. Begin winding by gently pressing the foot pedal. The machine will automatically stop when the bobbin is full. Resources like Manualsdir.ru and Mcgrp.ru provide visual aids demonstrating this process.
It’s crucial to avoid overfilling the bobbin‚ as this can cause issues with stitch quality. Regularly check the bobbin for even winding. If the bobbin isn’t winding correctly‚ ensure the thread is properly guided and the bobbin is securely attached. A consistently wound bobbin is vital for smooth and even stitching. Refer to the machine’s manual for detailed instructions and troubleshooting tips.
Basic Stitch Selection and Adjustment
The Singer Brilliance 6180 offers a variety of built-in stitches‚ easily selected using the stitch selection dial. This dial allows you to choose from straight stitches‚ zigzag stitches‚ and decorative stitches. Refer to the stitch chart‚ often found within the machine’s manual or on resources like Manualsdir.ru‚ to identify each stitch’s number and purpose.
Adjusting stitch length and width is crucial for achieving desired results. Use the length and width dials to modify these parameters. Shorter stitch lengths are ideal for delicate fabrics‚ while longer lengths are suitable for heavier materials. Zigzag stitch width controls the breadth of the zigzag pattern.
Experimenting with these settings is encouraged to understand their impact on the final stitch. Always test stitches on a scrap fabric before beginning your project. Mcgrp.ru provides images illustrating stitch variations. Proper stitch selection and adjustment are fundamental to successful sewing with the Brilliance 6180‚ ensuring both durability and aesthetic appeal.

Performing a Straight Stitch
Executing a straight stitch on the Singer Brilliance 6180 is foundational to many sewing projects. Begin by selecting the straight stitch option using the stitch selection dial – typically stitch number ‘1’. Ensure the stitch length is appropriate for your fabric; a medium length (around 2.5mm) is a good starting point.
Thread the machine correctly (refer to the threading guide) and wind a bobbin. Place the fabric under the presser foot‚ aligning the desired sewing line with the needle. Lower the presser foot to secure the fabric. Gently depress the foot pedal to begin sewing.
Maintain a consistent speed and guide the fabric straight‚ avoiding pulling or pushing. Use the guide markings on the needle plate as a reference. For longer seams‚ lift the presser foot between sections to pivot the fabric. Resources like Manualsdir.ru offer visual guides. Practice on scrap fabric to achieve a smooth‚ even straight stitch. Proper technique ensures a professional finish.
Zigzag Stitch and Applications
The Singer Brilliance 6180’s zigzag stitch offers versatility beyond basic seams. Select the zigzag stitch using the stitch selection dial; various widths and lengths are available. A narrower width and shorter length are ideal for reinforcing edges‚ preventing fabric fraying‚ and creating decorative elements.
Adjusting the stitch width controls the zigzag’s breadth‚ while the length determines the density of the stitches. Experiment on scrap fabric to find the optimal settings for your project. Zigzag stitches are invaluable for sewing stretch fabrics‚ allowing the seam to expand and contract with the material.
Applications include finishing raw edges‚ creating buttonholes (in conjunction with the buttonhole foot)‚ and decorative stitching. Manuals from sources like Mcgrp.ru illustrate various zigzag stitch patterns and their uses. Utilize different thread colors for a contrasting decorative effect. Mastering the zigzag stitch expands your sewing capabilities significantly‚ offering both functional and aesthetic benefits.
Buttonhole Stitching Guide
The Singer Brilliance 6180 simplifies buttonhole creation with its automatic buttonhole function. First‚ attach the buttonhole foot – a crucial step for accurate results. Select the buttonhole stitch on the machine’s dial; the manual (available on sites like Manualsdir.ru) details the specific stitch number.
Measure the button you’ll be using and adjust the buttonhole length accordingly using the length adjustment dial. The machine will then sew a series of stitches‚ creating the buttonhole outline. It’s vital to practice on scrap fabric to ensure correct sizing before working on your final project.

The machine automatically stops at each end of the buttonhole‚ allowing you to pivot the fabric; After completing the outline‚ the machine reinforces the buttonhole edges. Carefully cut open the buttonhole using the designated buttonhole opening tool or small scissors. Refer to online resources‚ such as those found on Mcgrp.ru‚ for visual guidance and troubleshooting tips. Consistent practice yields professional-looking buttonholes.
Troubleshooting Common Issues
Encountering problems with your Singer Brilliance 6180? Several common issues have straightforward solutions. Thread bunching often indicates incorrect threading – re-thread both the upper and lower threads‚ consulting the manual (Manualsdir.ru provides a downloadable version). Skipped stitches can stem from a dull or incorrect needle; replace it with the appropriate type for your fabric.
If the machine jams‚ stop immediately and carefully remove the fabric and bobbin. Check for tangled threads or fabric caught in the mechanism. Consistent tension problems might require adjusting the tension dials; test on scrap fabric after each adjustment. Refer to online resources like Mcgrp.ru for visual guides on tension settings.
For error messages‚ consult the manual’s troubleshooting section. If the bobbin winder isn’t working‚ ensure the bobbin is correctly placed and the thread is properly guided. Regular cleaning (detailed later) prevents many issues. Remember‚ patience and methodical checking are key to resolving most problems.
Needle and Presser Foot Guide
Selecting the correct needle is crucial for optimal sewing performance with your Singer Brilliance 6180. Universal needles are suitable for woven fabrics‚ while ballpoint needles are designed for knits to prevent snagging. Denim needles handle heavier fabrics effectively. Always refer to the manual (available on Manualsdir.ru) for specific needle size recommendations based on fabric weight.

The Singer 6180 comes with a variety of presser feet for different applications. The standard presser foot is ideal for general sewing. The zigzag foot accommodates zigzag stitches and decorative patterns. A buttonhole foot simplifies buttonhole creation. Explore additional feet like the satin stitch foot or blind hem foot for specialized techniques.

Proper presser foot installation is essential. Ensure the foot clicks securely into place. Adjust presser foot pressure based on fabric type; lighter fabrics require lower pressure. Resources on Mcgrp.ru often showcase presser foot usage. Regularly inspect your needles for damage and replace them as needed to maintain stitch quality.
Maintenance and Cleaning
Regular maintenance extends the life of your Singer Brilliance 6180. Power off and unplug the machine before any cleaning. Brush away lint from the bobbin area and feed dogs after each use. Use a small brush (often included with the machine) to remove debris; Refer to manuals found on sites like Manualsdir.ru for detailed diagrams.
Oil key lubrication points as indicated in the manual. Avoid over-oiling‚ as this can attract lint. Clean the exterior with a soft‚ damp cloth. Never use abrasive cleaners or solvents. Inspect the needle plate for buildup and clean thoroughly.
Periodically clean the bobbin case and race hook. A clogged bobbin area can cause tension issues. Resources on Mcgrp.ru may offer visual guides for cleaning. Proper cleaning ensures smooth operation and consistent stitch quality. Remember to re-oil after cleaning to maintain optimal performance. Consistent care prevents malfunctions and prolongs the machine’s usability.

Advanced Stitching Techniques
The Singer Brilliance 6180 offers a range of advanced stitching options beyond basic sewing. Explore decorative stitches for embellishing projects‚ referencing the manual (available on Manualsdir.ru) for stitch charts. Mastering these stitches adds a personalized touch to garments and home décor.
Utilize the adjustable stitch width and length to customize stitch appearance. Experiment with different presser feet (sold separately) to achieve specialized effects. Consider free-motion quilting‚ requiring a darning foot and lowering the feed dogs. Resources on Mcgrp.ru may showcase examples of advanced techniques.

Learn to combine stitch patterns for unique designs. Practice appliqué techniques using decorative stitches to secure fabric pieces. Explore monogramming with built-in alphabet stitches. Understanding stitch density is crucial for professional-looking results. Consistent practice and experimentation unlock the full potential of the machine. Refer to online tutorials for inspiration and guidance.
Safety Precautions

Prioritize safety when operating the Singer Brilliance 6180. Always disconnect the power supply before threading‚ changing the needle‚ or performing maintenance. Keep fingers away from the needle during operation to prevent injury. Never sew over pins‚ as they can damage the needle and machine.
Ensure the machine is stable on a flat‚ sturdy surface. Avoid using damaged power cords or plugs. Do not attempt to repair the machine yourself; contact a qualified technician. Keep the machine out of reach of children. Refer to the manual (found on sites like Manualsdir.ru) for detailed safety guidelines.
Always use the correct needle for the fabric type. Be cautious of moving parts‚ especially the presser foot and flywheel. Never force the fabric under the needle. Inspect the machine regularly for any signs of damage. Properly dispose of used needles to prevent accidental punctures. Resources on Mcgrp.ru may offer visual reminders of safety procedures.
Leave a Reply
You must be logged in to post a comment.