
cotton candy machine instructions nostalgia
Cotton candy machines evoke nostalgia, bringing back memories of carnivals and childhood treats. Their simple yet magical process of spinning sugar into fluffy floss delights people of all ages.
The History of Cotton Candy Machines
The concept of cotton candy dates back to the mid-19th century, but the first practical machine was invented in 1897 by Dr. William Morrison and John C. Wharton. Their “Fairy Floss” machine revolutionized the process, spinning hot sugar liquid into thin strands. It debuted at the 1904 World’s Fair, becoming an instant sensation. Over time, the name evolved to “cotton candy,” and modern machines improved efficiency. Today, these devices remain a nostalgic reminder of carnivals and celebrations, preserving the magic of this sweet treat for generations.
Why Cotton Candy Machines Evoke Nostalgia
Cotton candy machines evoke nostalgia by transporting people back to childhood memories of fairs, carnivals, and celebrations. The vibrant colors and sweet aroma of fluffy floss trigger sensory memories, reminding many of simpler, joyful times. The magical process of transforming sugar into a treat captivates both kids and adults, creating a sense of wonder. These machines often symbolize happiness and shared experiences, making them a beloved reminder of carefree moments and cherished traditions.
Essential Components of a Cotton Candy Machine
Cotton candy machines include a spinning head, heating element, and bowl to melt sugar, a motor for rotation, and controls for temperature and speed adjustment.

Key Parts and Their Functions
A cotton candy machine consists of several vital components. The spinning head heats and spins sugar into floss, while the motor powers this rotation. The bowl collects the floss, and the heating element melts sugar evenly. Controls regulate temperature and speed, ensuring optimal performance. These parts work together seamlessly to create fluffy, nostalgic treats, bringing joy to users of all ages with their simple yet effective design.
Understanding the Spinning Process
The spinning process in a cotton candy machine involves heating granulated sugar to its melting point, creating a liquid solution. This liquid is then forced through tiny holes in the spinning head by centrifugal force, cooling and solidifying instantly into thin strands. As the machine spins, these strands are flung outward, creating the fluffy, cotton-like floss. The combination of heat, centrifugal force, and air flow transforms simple sugar into a nostalgic treat, capturing the magic of childhood memories at fairs and celebrations.
Step-by-Step Setup Instructions
Unpack the machine, assemble the head and bowl, and plug in the power. Turn it on to test the spinning function before adding sugar for fluffy nostalgia.
Unpacking and Initial Assembly
Unpacking your cotton candy machine is an exciting first step. Carefully remove the machine, bowl, spinner head, and accessories from the box. Ensure all components are included. Begin by attaching the spinner head to the machine base using the provided screws. Next, secure the bowl under the spinner head to collect the fluffy floss. Plug in the machine and test it without sugar to ensure it spins smoothly. This initial setup sets the stage for creating nostalgic treats, bringing back memories of fairgrounds and childhood delight.
Connecting Power and Testing the Machine
To connect power and test your cotton candy machine, start by plugging the machine into a suitable electrical outlet, ensuring it matches the machine’s voltage requirements. Turn it on and let it run without sugar to check for smooth spinning and proper function. Observe the spinner head’s rotation and ensure there are no unusual noises or vibrations. This step is crucial for verifying that the machine operates correctly before adding sugar, helping you achieve the best results for making nostalgic cotton candy. Always follow safety guidelines and consult the manual for specific instructions.
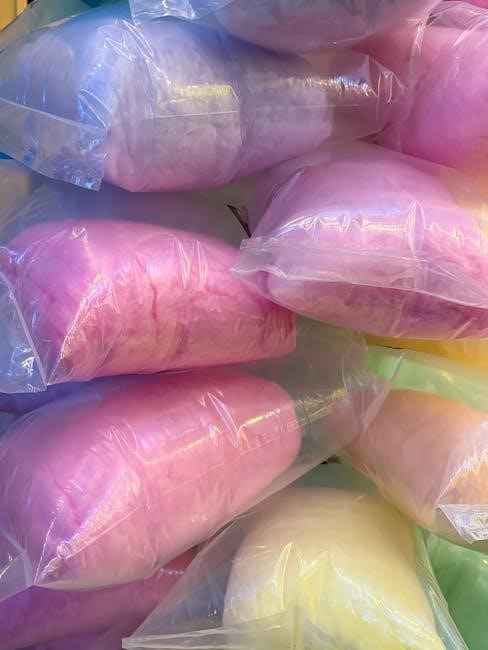
Creating Nostalgic Cotton Candy Flavors
Creating nostalgic cotton candy flavors brings back memories of childhood treats. Classic options like blue raspberry and pink vanilla are timeless favorites, evoking the magic of fairs, weddings, and parties. Using natural extracts enhances the authentic taste, making every bite a sweet trip down memory lane.
Classic Flavor Recipes
Classic cotton candy flavors like blue raspberry, pink vanilla, and yellow lemonade evoke nostalgia. These timeless flavors are simple to recreate using granulated sugar and food-grade extracts. Blue raspberry remains a crowd favorite, offering a sweet-tart taste. Pink vanilla provides a soft, creamy flavor reminiscent of childhood treats. Yellow lemonade brings a bright, citrusy twist. To enhance authenticity, use natural flavor extracts and vibrant food colorings. These recipes capture the essence of vintage fairgrounds and carnivals, making every batch a delightful trip down memory lane.
Modern Twists on Traditional Flavors
Modern twists on traditional cotton candy flavors offer a fresh spin on nostalgia. Try unique options like matcha green tea, strawberry basil, or mango chili for a contemporary flair. Gourmet flavors such as rosewater or lavender add sophistication, while candy-inspired options like blueberry muffin or caramel apple evoke childhood memories with a creative twist. Experimenting with natural extracts and vibrant colors allows you to craft one-of-a-kind flavors that blend the charm of the past with today’s innovative tastes, creating a delightful balance of nostalgia and novelty.

Tips for Achieving the Perfect Nostalgic Cotton Candy
Mastering temperature control and sugar consistency is key. Use high-quality sugar, avoid humidity, and maintain proper machine speed for fluffy, nostalgic cotton candy perfection every time.
Temperature and Sugar Consistency
Achieving the perfect nostalgic cotton candy requires precise temperature control and optimal sugar consistency. The ideal spinning temperature ranges between 300°F and 350°F, ensuring proper sugar caramelization without burning. Use superfine or cotton candy sugar for the best results, as larger crystals can cause uneven floss formation. Avoid humid environments, as moisture can prevent sugar from spinning effectively. Monitor the machine’s heat settings and adjust as needed to maintain consistent floss production. Proper temperature and sugar consistency are crucial for creating light, fluffy, and flavorful cotton candy that brings back nostalgic memories.
- Keep the machine at the recommended temperature range.
- Use high-quality, fine sugar for better results.
- Adjust settings based on environmental conditions.
Color and Presentation Ideas
Add a vibrant touch to your nostalgic cotton candy by experimenting with colors and creative presentations. Use food-grade dyes to tint the sugar in shades of pink, blue, or rainbow hues for a classic carnival look. Serve the floss in colorful cones, sticks, or even edible bowls for added charm. For themed events, match the cotton candy colors to the occasion, such as pastel shades for a vintage fairground feel. Creative presentation enhances the nostalgic appeal, making it a delightful treat for both kids and adults.
- Use food dye for vibrant color options.
- Serve in cones, sticks, or edible containers.
- Match colors to themes for a personalized touch.

Maintenance and Cleaning
Regular maintenance is crucial for extending the life of your cotton candy machine. Clean the spinning head, remove sugar residue, and dust internal components to ensure optimal performance and hygiene.
- Wipe down surfaces after each use.
- Check for sugar buildup in key parts.
- Sanitize all accessible areas thoroughly.
Regular Maintenance Tips
Regular maintenance ensures your cotton candy machine operates efficiently and lasts longer. Clean the spinning head, sugar reservoir, and heating elements after each use to prevent residue buildup. Use a soft brush or cloth to remove excess sugar, and avoid harsh chemicals that could damage components. Check for wear and tear on belts or brushes and replace them as needed. Proper lubrication of moving parts can also enhance performance. Sanitize all parts regularly to maintain hygiene and prevent mold growth, ensuring your machine remains in great condition for years of nostalgic cotton candy creation.
- Clean the spinning head and bowl after each use.
- Check for sugar buildup in the heating elements.
- Lubricate moving parts to ensure smooth operation.
- Sanitize all accessible areas to maintain hygiene.
Deep Cleaning Techniques
Deep cleaning your cotton candy machine ensures thorough removal of sugar residue and prevents clogging. Start by disassembling removable parts, such as the spinning head and bowl, and soak them in warm soapy water for 30 minutes. Use a soft-bristle brush to scrub away stubborn buildup. For tough residues, mix equal parts water and white vinegar or baking soda paste and let it sit before rinsing. Regular descaling can prevent mineral deposits, especially if using hard water. Dry all components thoroughly to avoid rust and ensure optimal performance for future use.
- Soak parts in warm soapy water.
- Use vinegar or baking soda for tough residue.
- Descaling prevents mineral buildup.
- Dry thoroughly to prevent rust.
Troubleshooting Common Issues
Troubleshooting common issues with cotton candy machines involves checking power connections, cleaning clogged parts, and ensuring proper sugar flow; Regular maintenance prevents recurring problems.
- Inspect power cords and plugs for damage.
- Clear sugar buildup in the spinning head.
- Ensure correct sugar grain size is used.
Resolving Spinning Problems
Spinning issues in cotton candy machines often arise from clogged heads or incorrect sugar grain size. To resolve this, clean the spinning head thoroughly and ensure the sugar used is finely granulated. If the machine fails to spin, check for blockages in the spinner or improper assembly; Adjusting the heat settings and ensuring proper sugar flow can also restore functionality. Regular cleaning and maintenance prevent such issues, ensuring smooth operation and fluffy cotton candy production every time.

- Clean the spinning head and surrounding areas.
- Use the correct sugar grain size for optimal spinning.
- Check for and remove any blockages in the spinner.
Fixing Sugar Clogging Issues
Sugar clogs in cotton candy machines are common but easily resolved. Moisture in the air or using the wrong sugar type often causes clogs. To fix, turn off the machine and let it cool. Use a damp cloth to wipe away excess sugar from the spinner. Avoid sticky sugars like brown sugar, as they clog more easily. Ensure the sugar is dry and finely granulated for smooth operation. Regular cleaning and proper storage can prevent future clogs, keeping your machine running efficiently.
- Turn off and cool the machine before cleaning.
- Use a damp cloth to remove excess sugar.
- Choose dry, fine-grained sugar for best results.
Leave a Reply
You must be logged in to post a comment.